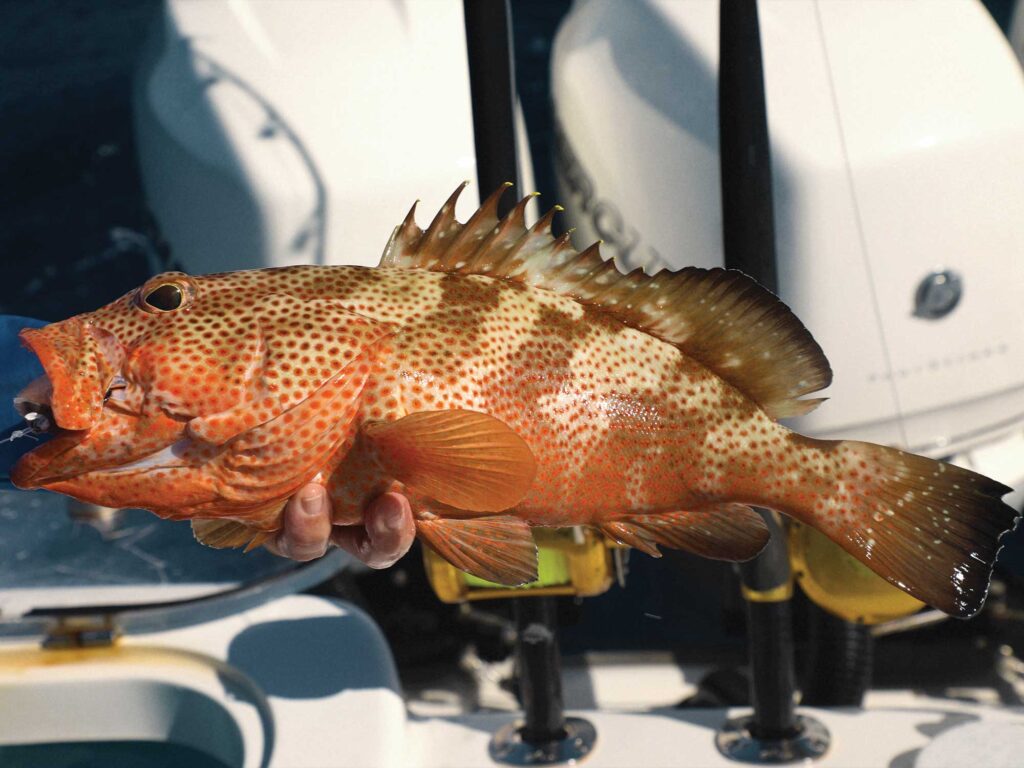
When bottom bites are few and far in between, the ballyhoo plug will shake things up. This popular rigging tactic fools not only leery mutton and mangrove snapper, but also grouper, cobia, and various lower- and midlevel species. As basic as the ballyhoo plug may appear, follow our guidelines to maximize its stealthiness and, in turn, effectiveness.
Capt. Ben Sharpe has been fishing the Bahamas and southern Florida waters for most of his life. Bottomfishing is a strong skillset of his; few pros are as impressive at turning around a slow bite. One of his tricks involves a meticulously rigged ballyhoo plug, especially in the clear waters of the Florida Keys, where he now spends most of his -fishing time.
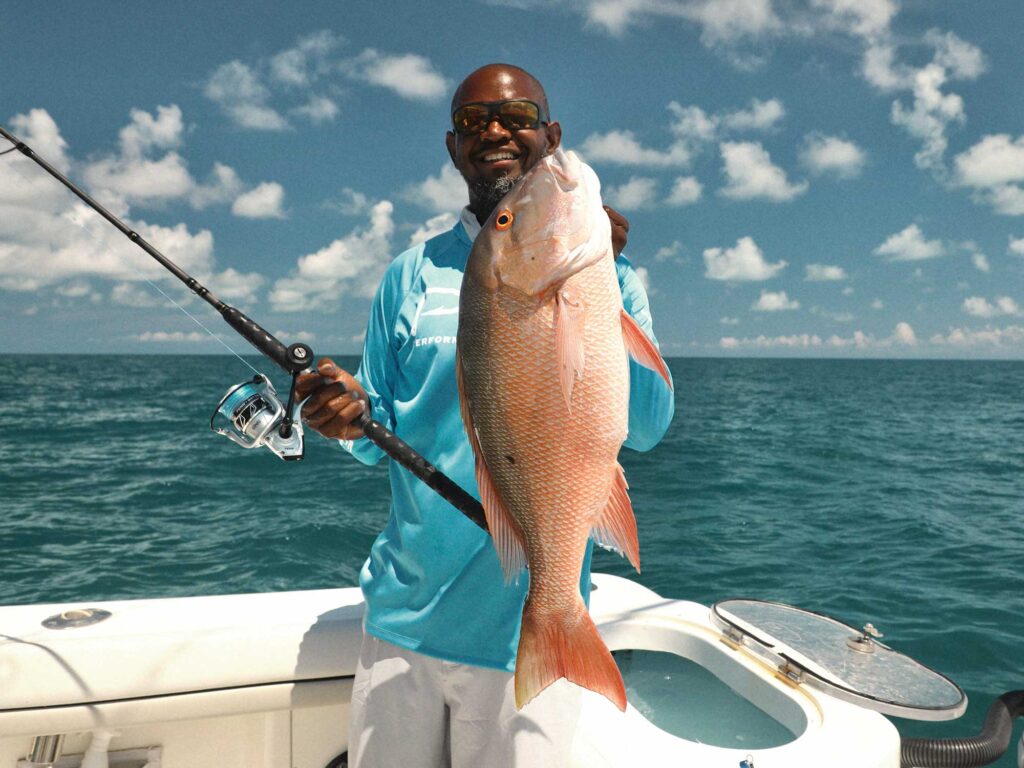
“People associate a ballyhoo plug with mutton snapper fishing,” Sharpe says. “Yet it works for a lot of fish, from yellowtails to mangrove snapper. I was recently fishing for mangroves and catching them on ballyhoo plugs. Nearly everything will eat one.”
Deal-Breaking Subtleties
Rigging a ballyhoo plug isn’t a matter of cutting the bait in half and pushing a hook into its body cavity. Doing exactly that will negate its effectiveness; the plug will spin, with its hook sliding out and into plain view.
“Inconspicuousness and balance are the keys,” Sharpe says. “The hook shank and eye must remain hidden and secured within the bait, and there’s a trick to making that happen (see Step 4). Also, the hook point needs to penetrate out of the center of the plug’s back, not off-center or, worse yet, through its side. That perfectly centered hook balances the plug.
“Think streamlined too. That is, cut off the ballyhoo’s tail right at its base, for a small-diameter opening, and rig the plug from its tail forward. The plug will be subject to less water resistance and tendencies to spin.”
Read Next: How to Rig Trolled Ballyhoo for Fishing
Drift or Sink
When fish are roaming within a chum slick, simply free-line a nonweighted ballyhoo plug. This is deadly when muttons and mangroves are off the bottom, or even with yellowtails—just use a smaller plug. Sizing a plug is a matter of cutting off the ballyhoo’s head and sectioning back.
For on-bottom placements in depths less than 30 feet and with minimal current, simply slide a sinker onto the leader (knocker rig). In deeper waters and stronger currents, opt for a fluoro leader of 30 to 40 feet long, with the appropriate weight affixed to a three-way swivel above the leader.
Keep It Light
Sharpe says to keep things light. Select the lightest fluorocarbon leader that can get the job done. Ditto with hook size. Also, seek freshly procured ballyhoo; fresh baits make a big difference. If ballyhoo come up in the chum slick, try to net or snag a few. Most bottomfish can’t resist a fresh-dead ballyhoo plug.
Let’s Split the Bill
To tempt large bottomfish and even pelagics, Sharpe makes a plug out of a whole, split-billed ballyhoo. He’ll limber up the bait by slightly crushing its backbone and milking it. The former is accomplished by applying slight pressure with his thumb and forefinger along the ballyhoo’s back while being careful not to tear its skin. The latter requires the same procedure, but along the bait’s stomach; this expels its excrement.
Easy Pickings
Inline (non-offset) circle hooks simplify ballyhoo plug-fishing. For bottom baits, place the rod in a gunwale holder and let fish hook themselves. When the rod bends and line peels from the spool, grab the outfit and enjoy the fight.
When free-lining ballyhoo plugs, provide a lot of slack line so the plug flows back naturally with the current, chum or chunks. Once the slack line takes off, simply engage the reel’s drag and reel steadily to set the hook. Then you can resume your pumping and winding routine.
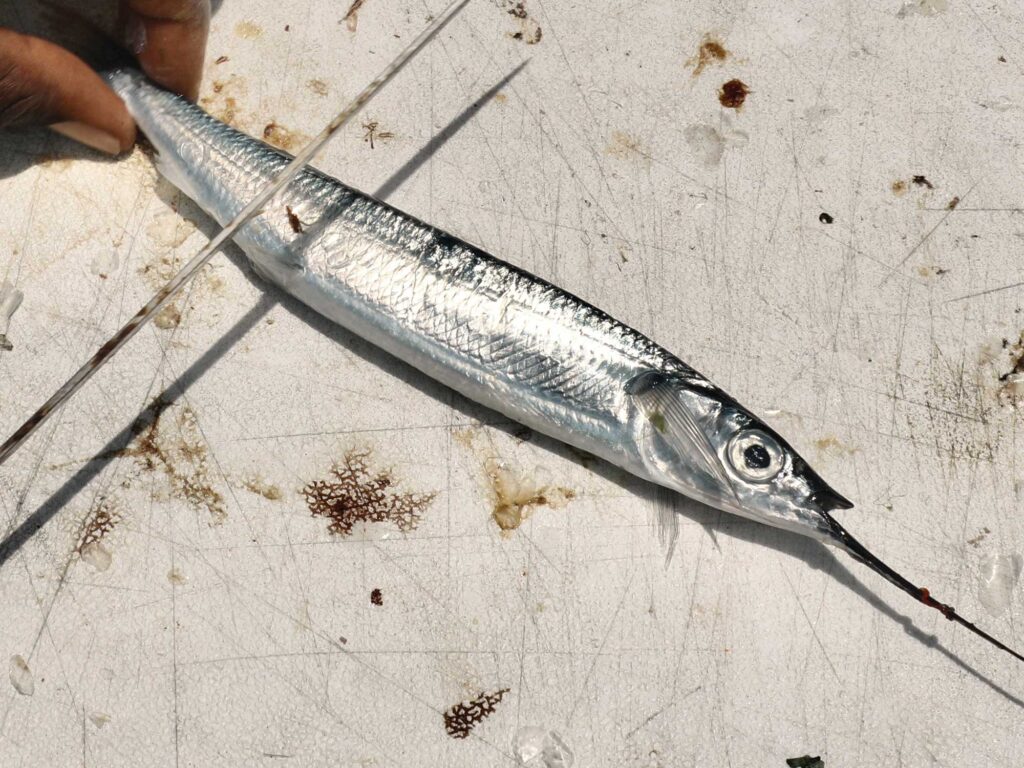
Rigging a Ballyhoo Plug
Step 1: Remove the ballyhoo’s tail close to its base. Keep the cut flush and the diameter small. This will serve as the head of the plug. The smaller the diameter, the less water resistance it generates.
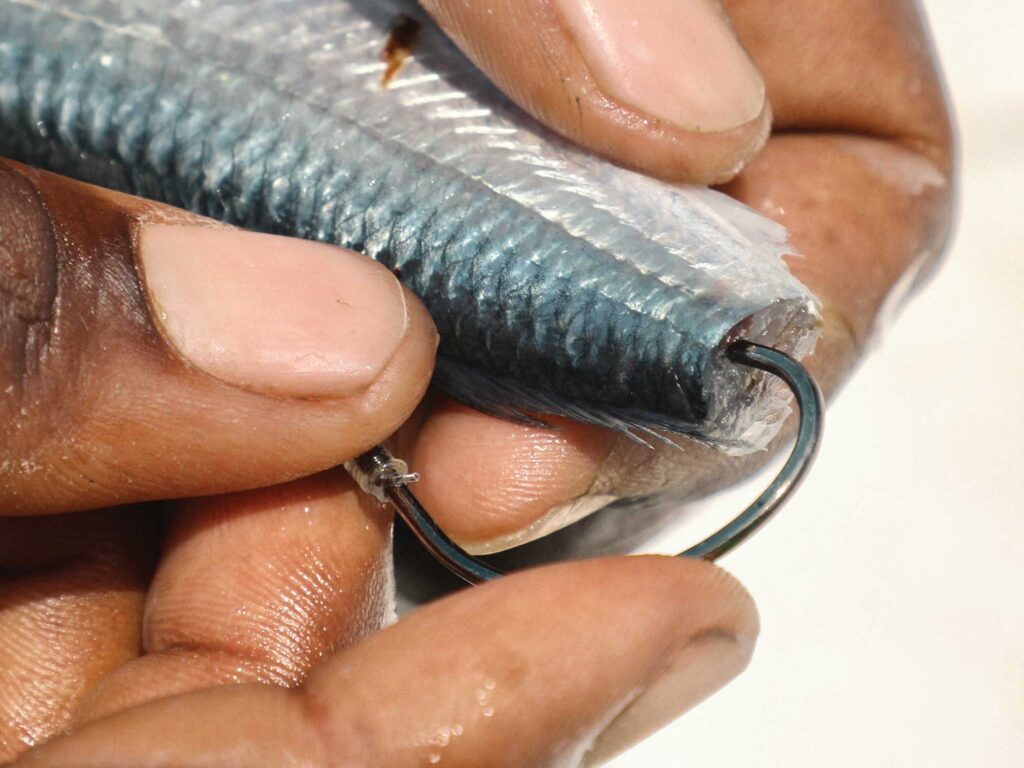
Step 2: Insert a circle hook, making certain to keep it centered and in line with the ballyhoo’s backbone. Bringing the hook point out of the center prevents spinning.
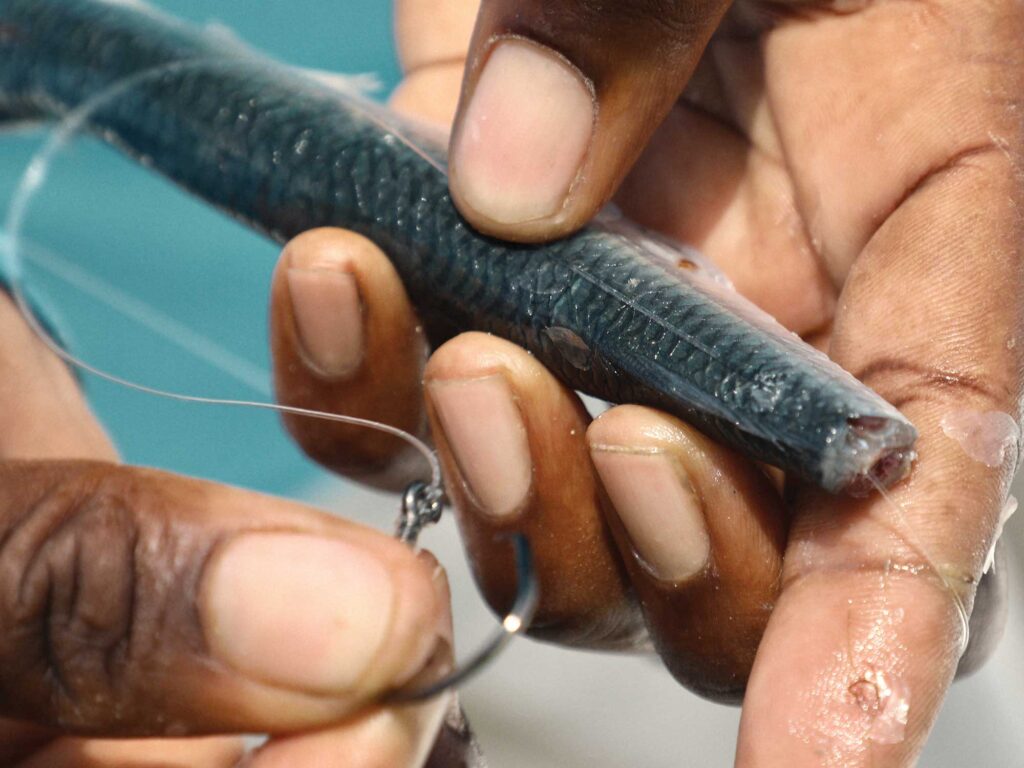
Step 3: Pull the entire hook through the ballyhoo’s back, along with a few inches of leader.
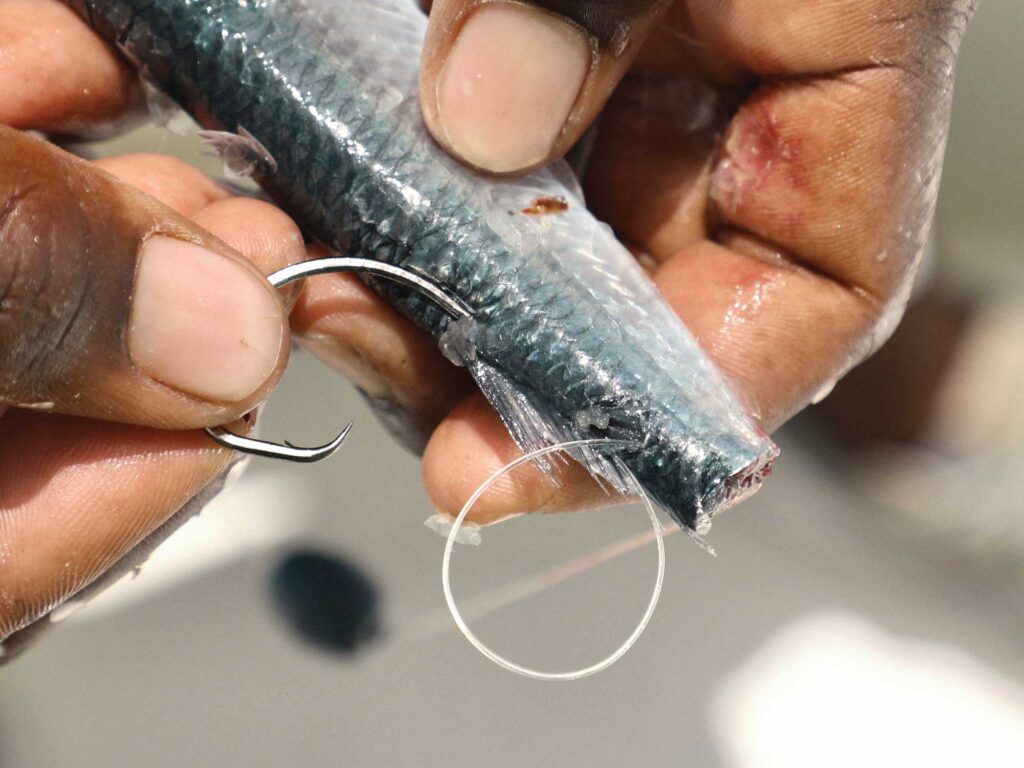
Step 4: Reinsert the hook back into the hole from which it exited, and bring the point back up through the center of the ballyhoo’s back. The distance forward should be just enough to where the hook’s shank and eye are contained within the ballyhoo. Ben Sharpe stresses the importance of this step because it locks in the hook. That means no slippage or pulling out.
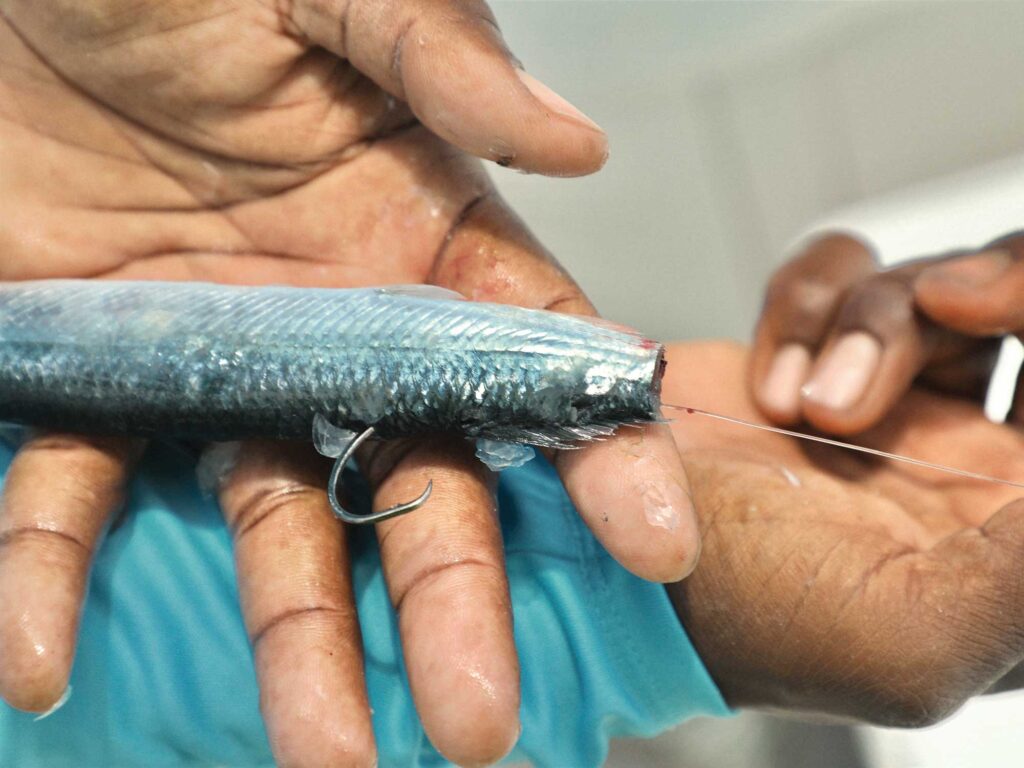
Step 5: Pull the standing leader tight to the hook to eliminate slack.
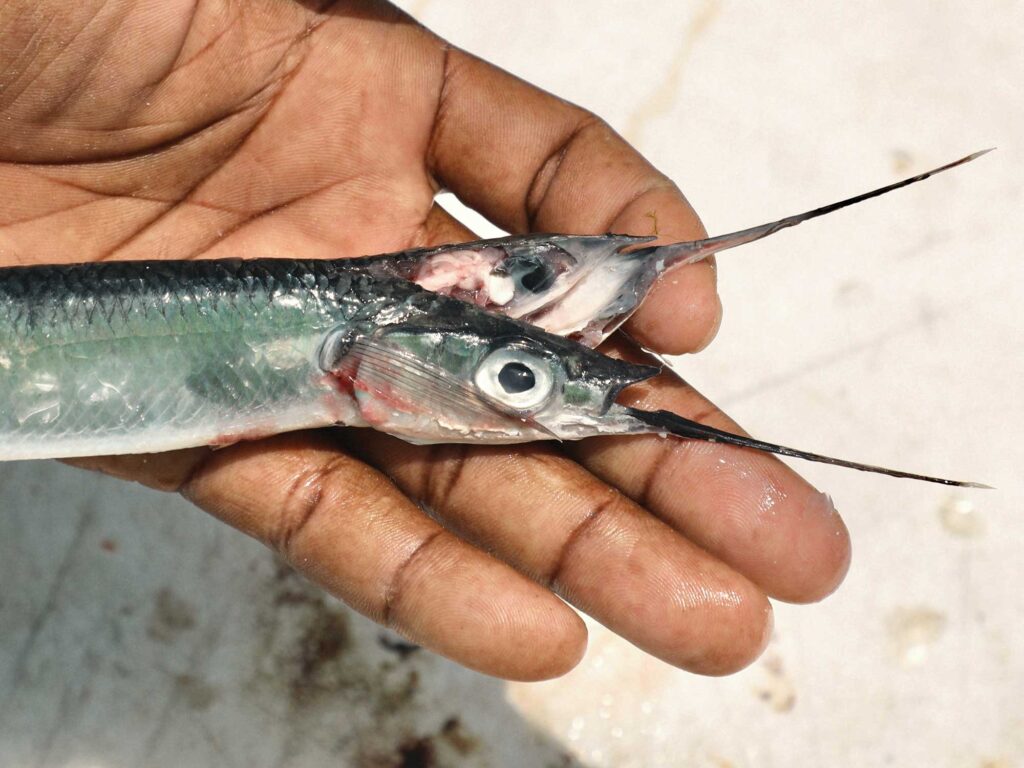
Split-Bill Variation: Follow the steps above, with the addition of splitting the ballyhoo’s head and beak down the center with a sharp knife.


